
Want to learn how to take stunning portrait photos using just your mobile phone? You’re in the right place! This guide will provide you with essential tips and techniques to elevate your mobile portrait photography, whether you’re a complete beginner or looking to refine your existing skills. We’ll cover everything from understanding lighting and composition to mastering your phone’s camera settings and exploring creative editing techniques. Learn how to capture beautiful and compelling portraits that truly capture the essence of your subjects, all with the convenience of your mobile device.
Taking professional-looking portraits with your phone’s camera is more accessible than ever. This comprehensive guide will demystify the process and empower you to capture high-quality portrait photos on the go. We’ll delve into the key principles of portrait photography, including posing, focusing, and utilizing natural light to its fullest potential. Discover how to transform ordinary snapshots into captivating portraits that showcase your subject’s personality and capture memorable moments with the power of mobile photography.
Understanding Portrait Mode
Portrait mode is a powerful feature on modern mobile phones designed to enhance your portrait photography. It simulates the shallow depth of field effect typically achieved with professional cameras and lenses. This means the subject stays sharply in focus, while the background becomes pleasingly blurred, creating a professional and aesthetically pleasing look.
This effect, often referred to as “bokeh,” helps to isolate the subject, drawing the viewer’s eye directly to them. It minimizes distractions in the background and emphasizes the person being photographed.
Portrait mode achieves this by using a combination of software and hardware. It utilizes the multiple camera lenses on the phone to calculate depth information and then applies sophisticated algorithms to blur the background accordingly.
Key Advantages of Using Portrait Mode:
- Creates professional-looking bokeh.
- Emphasizes the subject and minimizes background distractions.
- Enhances depth and dimension in your portraits.
Lighting and Background Tips
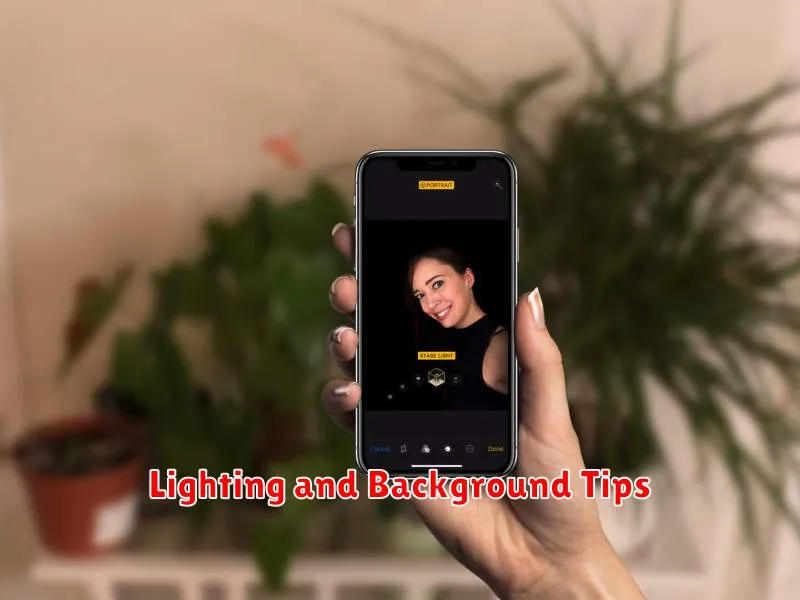
Lighting plays a crucial role in portrait photography. Natural light is generally preferred. For outdoor portraits, the golden hour (shortly after sunrise or before sunset) provides soft, warm light. Overcast days also offer diffused light that’s flattering for portraits. Avoid harsh midday sun which can create unflattering shadows.
If shooting indoors, position your subject near a window for soft, natural light. If artificial light is necessary, try to diffuse it with a lampshade or thin curtain to soften its intensity.
The background should complement the subject, not distract from them. Look for simple, uncluttered backgrounds. A plain wall, greenery, or even a blurred cityscape can work well. Consider the background’s color and texture and how it interacts with the subject’s skin tone and clothing.
Experiment with depth of field to blur the background and make your subject stand out. Most mobile phones have a portrait mode that does this automatically.
Focus and Depth Adjustments
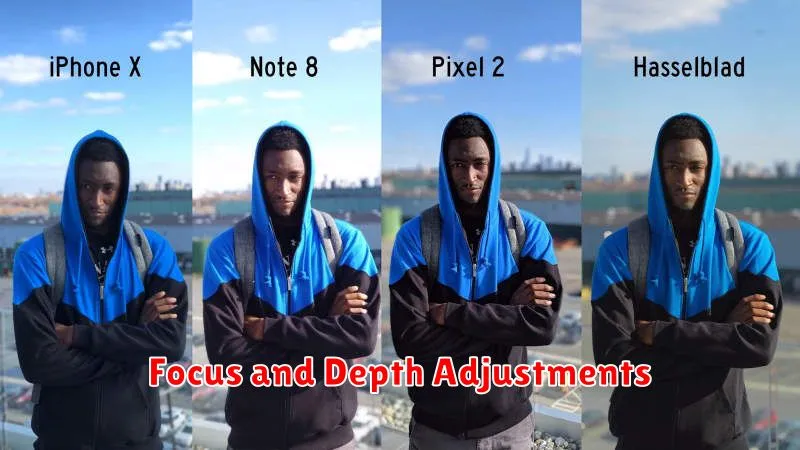
Focusing correctly is crucial for compelling portraits. Most mobile cameras allow you to tap the screen to set the focus point. Ensure your subject’s eyes are in sharp focus, as this is the most important element in a portrait.
Depth of field controls how much of the image is in focus. A shallow depth of field blurs the background, isolating your subject and creating a professional look. Many mobile phones offer a “Portrait Mode” which utilizes software to simulate this effect. Experiment with this feature to achieve the desired background blur.
If your phone lacks a dedicated Portrait Mode, consider moving your subject further away from the background. This can help create a natural separation and a shallower depth of field.
Using Grid for Framing
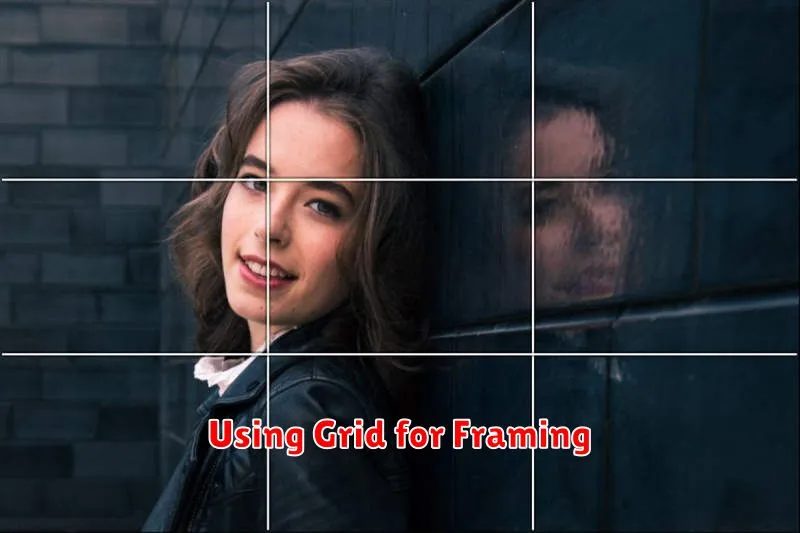
The grid feature on your mobile phone can be a powerful tool for improving the composition of your portraits. Enabling the grid overlays a series of lines on your screen, dividing it into thirds both horizontally and vertically, based on the “rule of thirds”.
This helps you position your subject off-center, creating a more visually appealing and dynamic image. Rather than placing your subject directly in the middle of the frame, consider aligning them along one of the vertical lines, or at the intersection of a vertical and horizontal line.
The grid also assists with maintaining level horizons and straight vertical lines, especially in architectural or landscape backgrounds. It provides a helpful reference point to ensure everything is properly aligned, preventing tilted and distracting compositions.
Editing Portraits with Apps
Once you’ve captured a portrait, editing can further enhance its quality. A plethora of mobile apps offer powerful editing tools, often for free or at a low cost. Choosing the right app depends on your specific needs and skill level.
Key features to look for in a portrait editing app include:
- Adjustment tools: These allow you to fine-tune brightness, contrast, shadows, highlights, and white balance.
- Spot healing: This feature is crucial for removing blemishes or unwanted objects.
- Selective editing: The ability to edit specific areas of the image, like adjusting the brightness of only the face, provides greater control.
- Portrait-specific enhancements: Some apps offer features like skin smoothing, teeth whitening, and eye brightening.
When editing, strive for subtle enhancements rather than drastic changes. Over-editing can result in an unnatural and artificial look. Remember, the goal is to enhance the natural beauty of the subject, not to create a completely different image.
Avoiding Overexposure
Overexposure results in washed-out images with loss of detail, particularly in the highlights. It’s a common issue in mobile photography, especially in brightly lit scenes. Controlling exposure is crucial for achieving a well-balanced and visually appealing portrait.
Your mobile phone camera’s auto-exposure can sometimes misjudge the scene’s brightness. Tap on the subject’s face on your screen to set the focus and exposure point. This tells the camera to prioritize exposing the face correctly, even if the background is bright.
If tapping to focus isn’t sufficient, utilize the exposure compensation feature. This is usually an icon that looks like a +/- symbol or a sun icon. Dragging it up or down allows you to brighten or darken the image respectively. Lowering the exposure slightly can help retain detail and prevent blown-out highlights.
HDR mode (High Dynamic Range) can also be helpful in high-contrast situations. HDR takes multiple exposures and combines them to create an image with a wider range of tones, helping preserve detail in both shadows and highlights.
Best Angles for Natural Shots
Finding the right angle can significantly impact how natural and flattering a portrait appears. Avoid shooting from below, as this can distort features and create unflattering shadows. Instead, aim to shoot from slightly above eye level. This angle tends to be more flattering for most face shapes.
Consider the subject’s posture and positioning. Encourage a relaxed and natural stance. A slight tilt of the head can add a touch of elegance and visual interest. Experiment with different angles and observe how they affect the overall composition and mood of the photograph.
For a more candid and engaging portrait, try capturing your subject while they are looking away from the camera. This can create a sense of depth and narrative in the image, making it feel less posed and more authentic. Remember, the goal is to showcase the subject’s personality and capture a genuine moment.